Sunday, December 31, 2006

Weekend Dog Blogging 2006

This last weekend of 2006 marks the last week of Doggie blogging for the year. Sweetnicks has been kind enough to host this event and I want to thank her very much. (Thanks Cate)

With all the holiday planning, cooking and family visiting from out of town, it has been very hard to post and blog about my Ziggy. I hope Cate will continue WDB in 2007.

Santa did visit Ziggy. Here he is being teased by my son. Ziggy loves this toy.

Happy New Year To All

Happy New Year

It's New Year's Eve and for the life of me I don't know where 2006 went. The older you get the faster the time goes.

Today my time is devoted to organizing and setting up a new gadget. My present from my hubby this Christmas included a new refrigerator. He spent hours on line and checking out appliance stores all over Los Angeles. I was very picky about what I wanted. Firstly it could NOT be a GE nor Kitchenaid. Why? Well my old refrigerator was a GE and proved to have many problems with insulation which should not have occured. A couple of times a year my hubby has to get use a blow dryer to melt all the ice formed in the back of the freezer compartment (self defrosting?- should be but is not. My neighbor recently bought a Kitchenaid and has had the worst experience with their customer service department and service. She has had it for almost a month with numerous service visits already and it still doesn't work yet they refuse to replace it with another one- lemon. They insist on trying to fix it with wasted time overseeing service personnel who still can't get it working. It was brand new and not refurbished when she got it.

My other prerequisites included that it had to be stainless steel with french style doors. I needed at least 25 cubic feet of space and I preferred not to have the ice maker and water on the outside(to decrease potential service problems), but as manufacturers and appliance stores seek to milk you for all they can get, they only stock those with these bells and whistles. Yea, you can get those without but then you have to wait for the order to come in and we didn't plan this early enough in advance. Did I mention that my current refrigerator was on it's last leg?

While looking at what's available in the marketplace, we found out that Maytag manufactures most of all the brands out there including Amana and some Vikings just to name a couple. When you look at the guts, they are all alike with just a name plate on the outside to separate high end from low end pricing. Consumer reports indicate the Maytags/Amana in the french style were higher rated. I read some poor reviews regarding the exhorbitant amount of space the icemakers take up in most refrigerators, but then I'm not into ice cube trays.

What did I get? A Maytag Ice2go.


Refrigerated area


Freezer compartment


Refrigerated area filled

Freezer compartment filled to capacity

Tuesday, December 26, 2006

Christmas Dinner Pictures

Not a lot of time to post about our family's Christmas dinner but thought a few pictures would hold until later.


Sunday, December 24, 2006

Season's Greetings

I've started my food prep for Christmas dinner. I'm not going to disappoint anyone so I'm doing my usual overboard too many choices menu.

Smoked Turkey
Smoked Ham
Sirloin Roast
Baked Salmon
Rack of Lamb (maybe?)
Mac and cheese
Corn Pudding
Southern Greens with hamhock
Candied Sweet Potatoes
Green Beans
Monkey Bread

The ham is on the smoker. The turkey is brining in a mixture of salt, brown sugar, garlic, cloves, allspice, apple cider, water and soy sauce. Got another 9 hours to go on it. I'll start the sirloin roast in the morning along with many of the sides.

Monday, December 18, 2006

Tamales


Masa purchased 'prepped" meaning the masa was already mixed with lard to the correct consistency
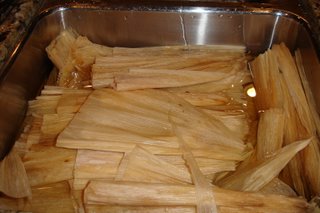
Corn husks soaking
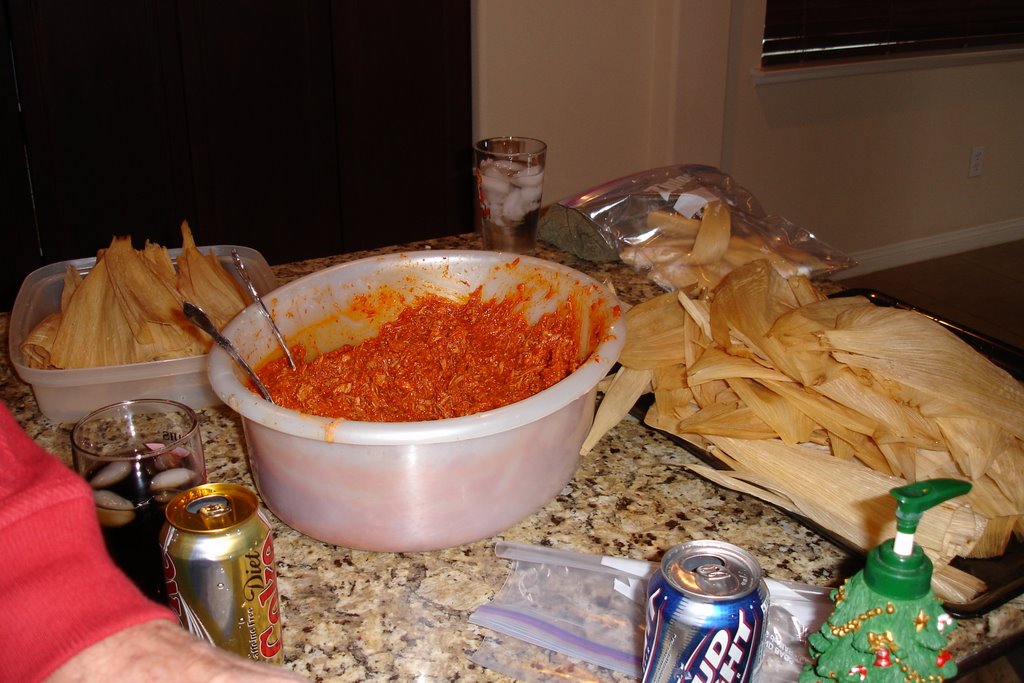
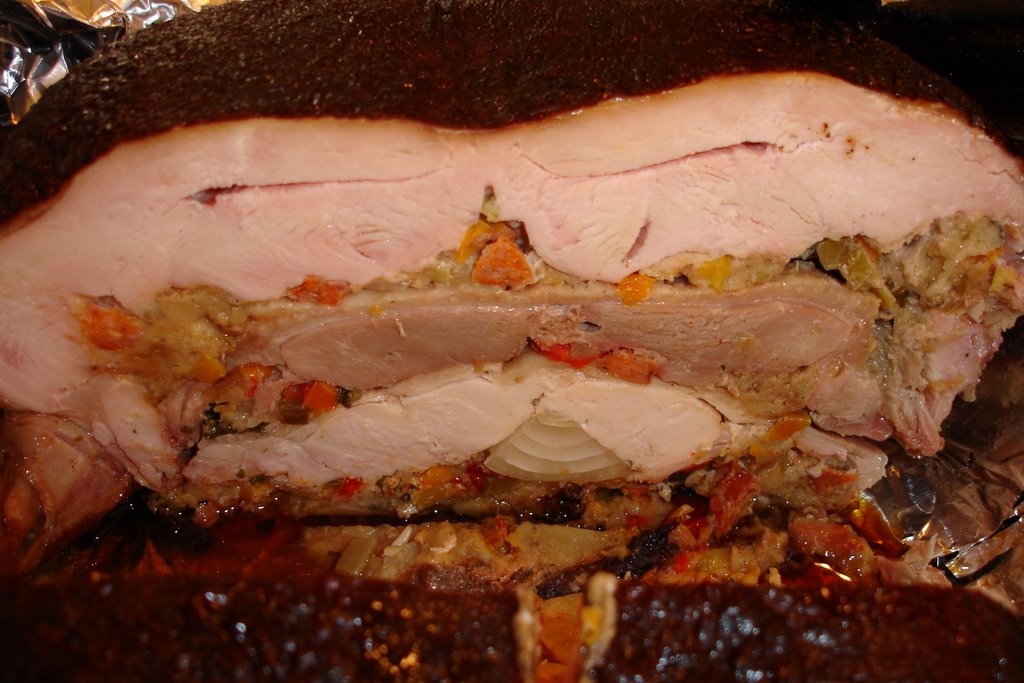
Pork mixed with chile sauce made from dried New Mexico chiles and California chiles with seasonings. The meat is cooked the night before and refrigerated. This assures that the meat mixture is chilled and fats congealed. This assures that the meat does not dry out when the tamale is steamed. Think about it. If a warmed meat mixture was used the juices would run off the meat remaining in the container prior to when rolled in the tamale. Less moisture in the meat means a dry tamale.

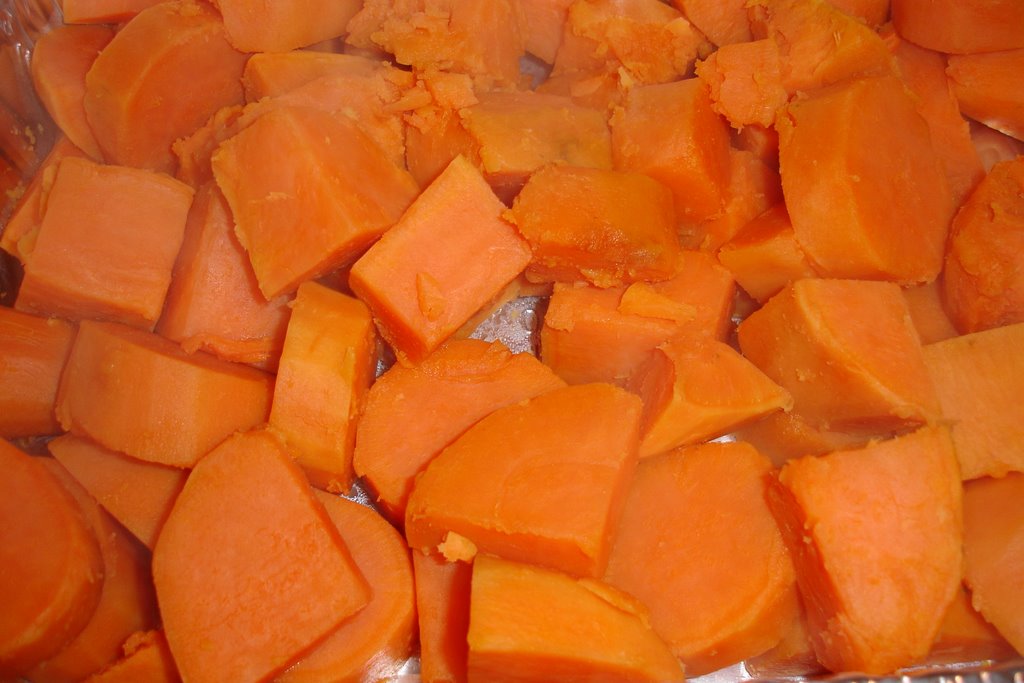
Other ingredients typically used to fill tamales includes chicken, beef, or roasted chiles with cheese. Be creative.


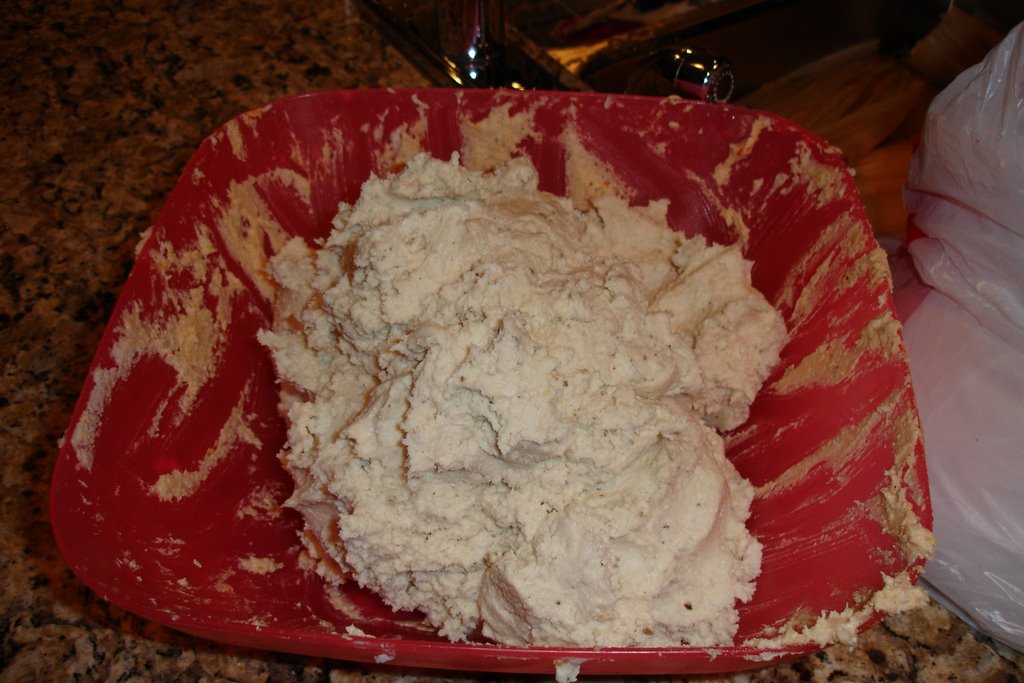
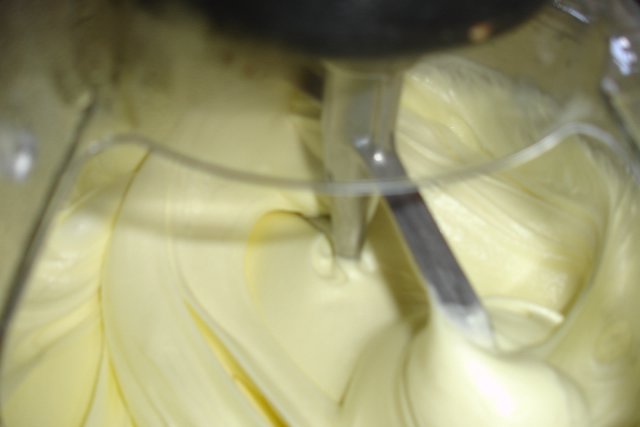
Though the masa was purchased prepped, it is very important to add additional flavoring. Here I am mixing the masa with some of the chile sauce and broth from the cooked pork. This lightens the masa dough for a less dense tamale. The end point of this addition of flavors is by feel. Getting your hands all in it to mix is essential.


Here I am being taught the tamale roll technique by a master.


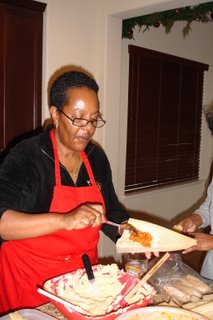
The teacher and all her pupils. Tamale parties or family gatherings have a greater significance than merely preparing tamales. It is an opportunity for families and friends to spend time together drinking, gossiping, laughng and having a good time. Traditionally tamales are an essential food for the Christmas holidays and New Years. Many dozens are usually prepared to give as gifts to neighbors, friends and families.


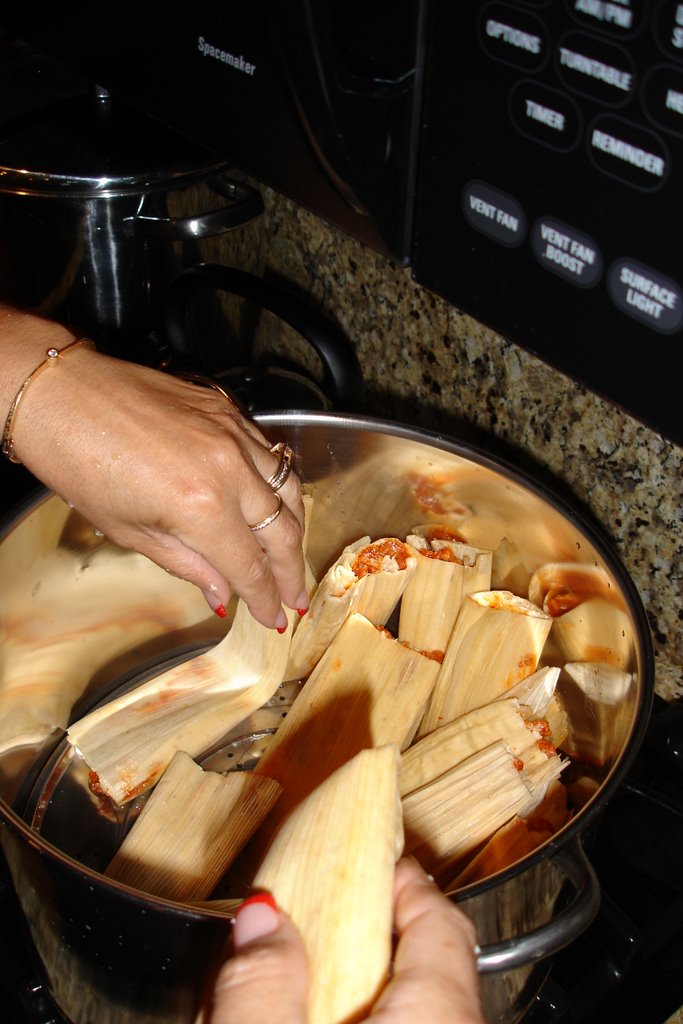
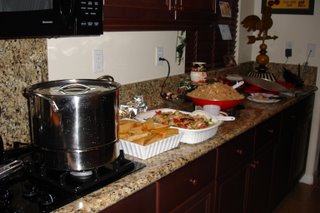
Once rolled, the tamales are placed in a steamer. It is important to not allow them to come in contact with standing water in the steamer. If you don't have a special steamer, simply using a stock pot with an elevated rack or just a pie plate with holes punched in it and placed upside down in the bottom of a stock pot will work. A cotton towel is placed over the top of the tamales, then the lid. After about an hour and 15 minutes, the tamales are ready. You can test for doneness by unwrapping a sample. If the masa separates from the corn husk easily, they are done and ready to be served with beans and rice.


See Flickr Photo set of more highlights of the tamales party.


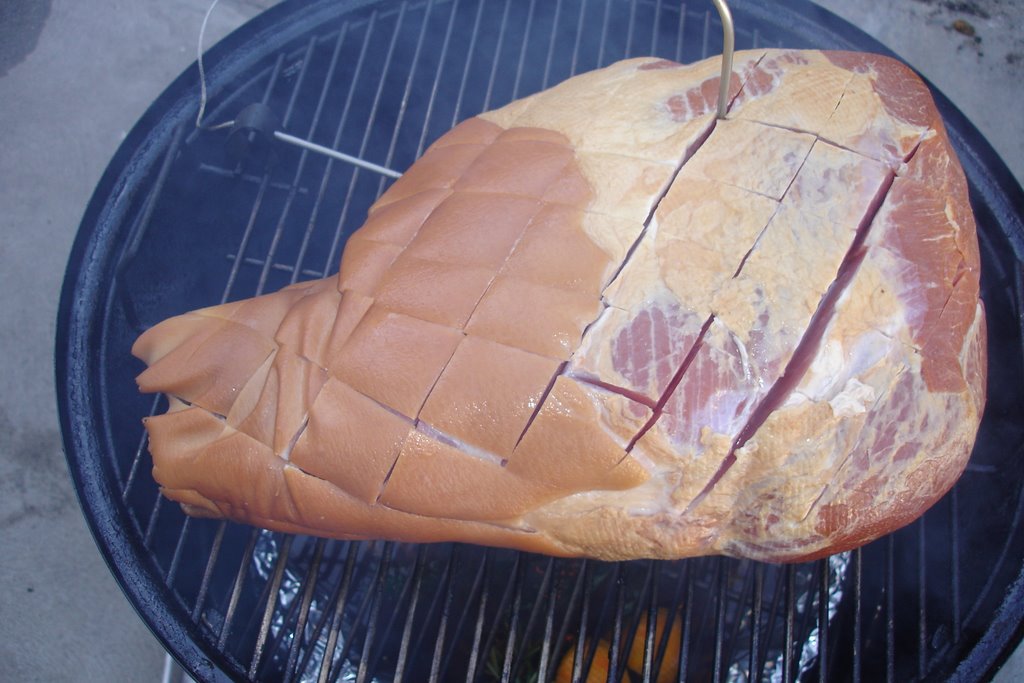
The below recipe is not the one we used during the party. This one uses smoked pulled pork which adds another layer of flavor. Since pulled pork is my specialty, I thought this recipe would be of interest.

Tamale Recipe From BBQ Brethren Site Courtesy of Thirdeye

HUSKS
Bags of dried corn husks are available in most markets in the Mexican food section. They need to be soaked in warm water for about an hour, separated and rinsed clean of any dried silks, and kept moist for rolling in a dish pan.

FILLING
Three ground chili powders (with no other spices added) and one chili powder blend are used to get a traditional flavor footprint that is sweet, smokey and hot. The total amount of the chili powder is 1 cup + 2 tablespoons. Ground chili peppers and blends can be found at www.penderys.com if you can’t find some local substitutes. The filling must be quite robust because the steaming and the masa will buffer the flavor and the heat factor a little.

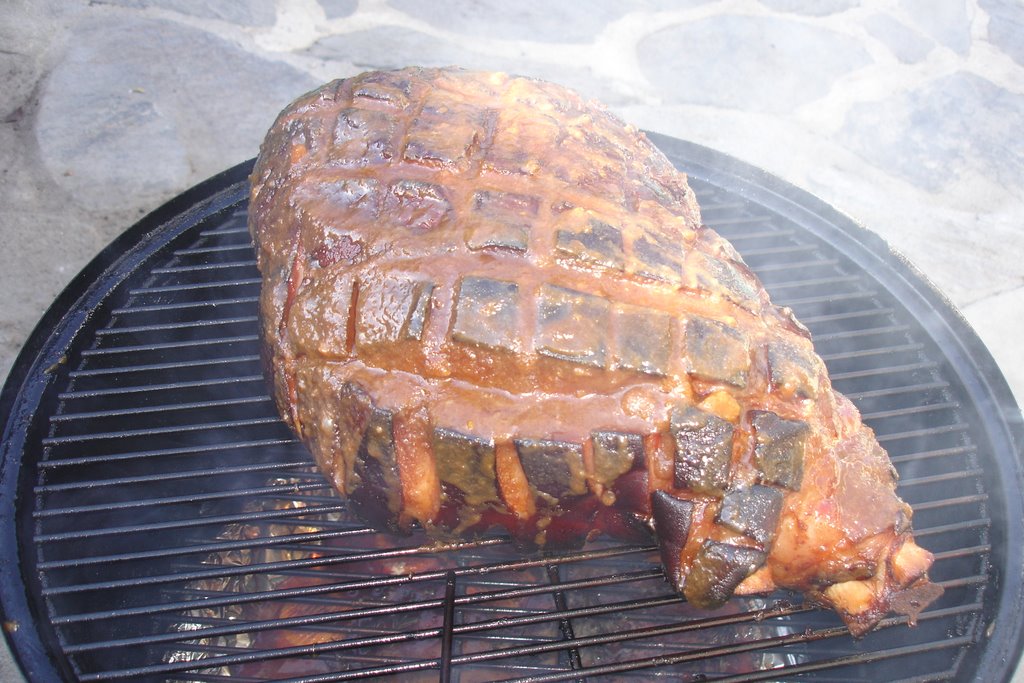
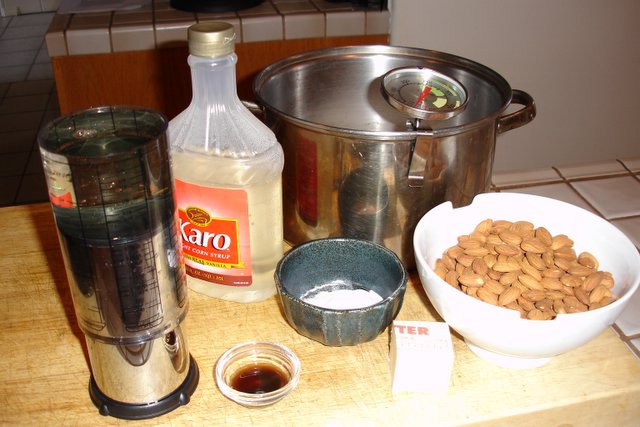
7 or 8 pounds of pulled pork butt (medium to fine shreds).
¼ cup Chimayo chili powder
¼ cup Tularosa chili powder
2 tablespoons Mulato chili powder
½ cup Top Hat chili powder blend
¼ cup cumin
1-1/2 tablespoons crushed tepin peppers.
1 tablespoon Mexican oregano
2 tablespoons salt
6 tablespoons fresh garlic, chopped
1 tablespoon garlic powder.
Chicken broth & water - about 4 cups total

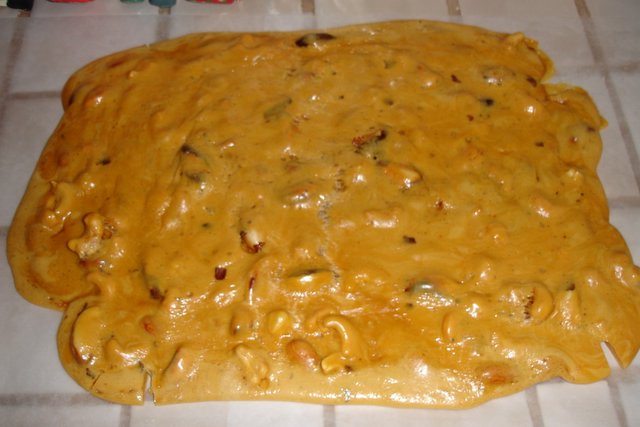
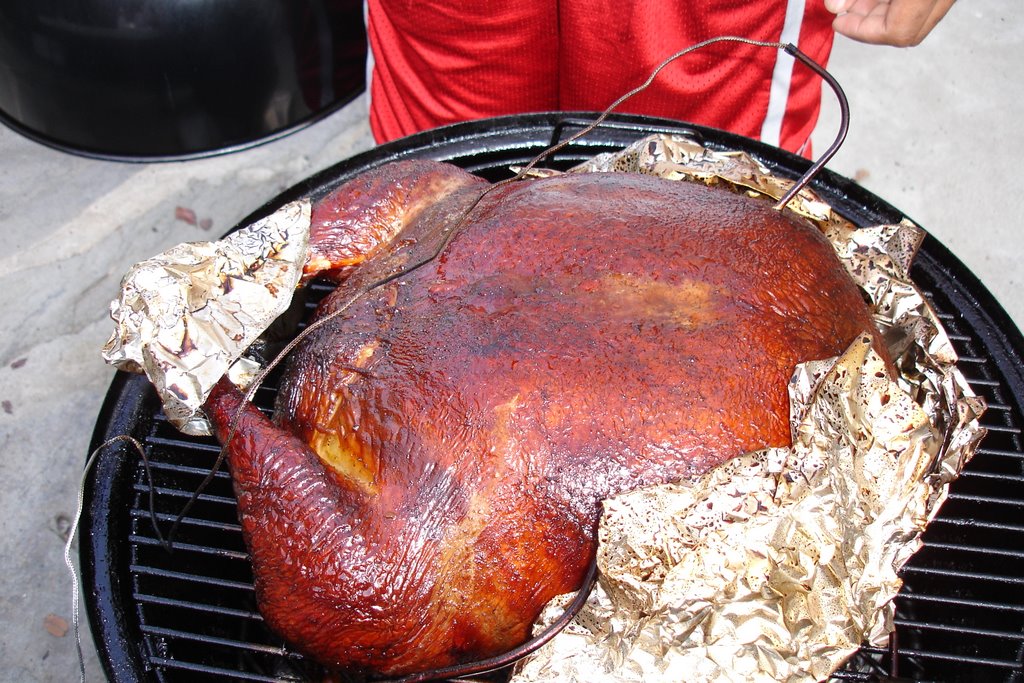
Place the pulled pork in a large Dutch oven or roaster. Add all of the ingredients except the broth and water, mix in well. Add about half of the broth and water, mixing in well. Bring this mixture to a simmer in order to reduce the liquid, stirring occasionally. Add more liquid at least once more and continue to reduce until the filling is just a little soupy, then set aside to cool. Once the mixture has begun the first reduction, the Dutch oven can be transferred to your cooker, at around 275° grate temperature, to receive a little smoke flavor during the final stages of the reduction.
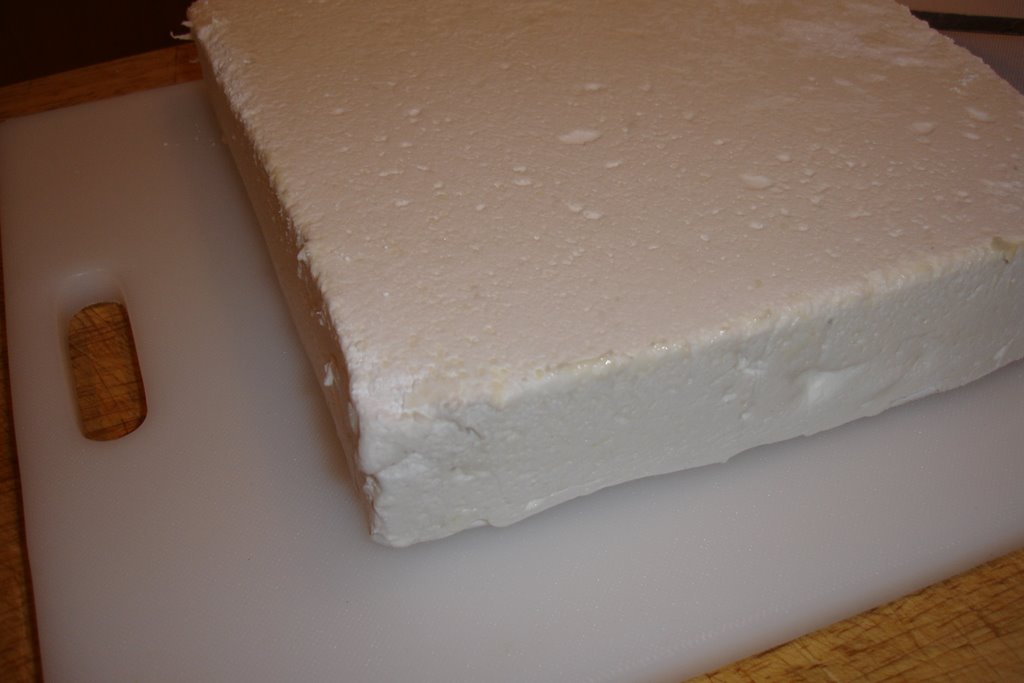
Fresh masa keeps in the refrigerator for a few days and also freezes well, it comes in 1 or 5 pound blocks. Add warm water or broth and work into a dough with a spongy texture. For the mixes, follow the directions on the bag. The dough needs to be spreadable and can be moistened during the assembly if it becomes too stiff.

ASSEMBLY
Everyone has a different masa spreading technique and have a favorite tool. I like a triangular shaped pie serving utensil. A wide putty knife or small triangle trowel works well too. It is best to have an assembly line with one person spreading and another filling and rolling. I like to use a big cutting board for the assembly. And work at the kitchen table. A glass of warm water is handy for dunking the spreading tool.

Remove a few husks from the dishpan and shake off any water. Tear them so that they are about five fingers wide. Husks have a coarse side and a smoother side. Lay one husk on the work surface and spread about 2 tablespoons of masa onto the smooth side of the husk forming a thin even layer. (TIP: A sprinkle of chili powder can be added to the masa before adding the filling). Add about one fingers width of filling onto the masa and roll the tamale closed, then fold the narrow end down. These can be tied with strips of husk or stacked on a tray with the fold down.

Less than 7 Days Til Christmas

With Christmas only a week away, I have beeen very busy getting my home ready and full of holiday cheer plus doing a lot of food prep. I think I have gome overboard in that I can't make up my mind on what to cook so I'm doing it all. You'll have to come back to see what's in store.

I did n't have a chance to post this weekend (blogger has been really slow and me really busy) but I had a funfilled treat on Saturday. G and I were invited to a Tamale Party. Yes, I now can make authentic Tamales. I'm preparing a post on this with highlights of the evening. It was wonderful.

I also have been missing Weekend Dog Blogging. Ziggy is doing fine. He's got T (my son) to play with and to lavish him with attention.

Til later, Sylvie

Sunday, December 10, 2006

Sweet Treats- Marshmallows and Nut Brittle

My friends over at Peanut Butter Etouffee gave me some ideas of some sweet treats to cook for the holiday season. With some time this weekend and an overwheelming obsession to make both these treats, I jumped in full force.


Now what could be so exciting about making marshmallows and peanut brittle? Simply I've never made them before and I'm game for a challenge.

With further research I found a post over on egullet with a recipe submitted by nightscotman for strawberry marshmallows and variations including chocolate marshmallows. What the heck, let's go for it. I headed to Surfas for a few items like a non-glass candy thermometer taking PBE's recommendation. Guess what they had on display immediately to your right at the customer service desk as you walk in the door. Homemade marshmallows by what appears to be an independent baker on consignment (sorry I don't recall the name). Four large marshmallows of varying flavors with some cute sparkling something coating them and looking like tempting little pillows. At $4.95 for four, they better be good. I didn't purchase any as I am gonna make my own but truth be told, I was tempted.

For the peanut brittle, I purchased some raw mixed nuts and some almonds from Trader Joe. They didn't have any raw peanuts. I also thought of using some pecans which I already had at home.


So here we go. I actually looked forward to this project. Can't say I lost sleep but I did wake up during the night with thoughts of puffy pillowy marshmallows all around me. I must be sick.

I used the egullet recipe for the marshmallows and Miss Lillian's recipe from Peanut Butter Etouffee for the nut brittle.

My marshmallow flavors included a vanilla version, chocolate and lemon.


Sugar, corn syrup, water and salt to temp


Chocolate, gelatin and water

Lemon, gelatin and water


Chocolate and lemon proofing, vanilla cut


Vanilla Marshmallows Proofing


Ready to be Cut and Dusted


Nut Brittle Prep


To temp


Nuts added- cook to light amber color


Cooling

Will I ever do this again? Yes. I really enjoyed the prep especially with the marshmallows. The end result of combining sugar, water, gelatin and some heat is far out. What did I learn from this experience? The nut brittle was the hardest. Once I added the nuts, I had a hard time determining when the color was just right. Just a couple of seconds over and it came out burnt tasting. (Yes, I made three batches.) I also question the amount of baking soda. The recipe calls for 2 tablespoons but I can't get over the baking soda taste in the end product. The final mixing of the brittle for 30 seconds minimum is absolutely necessary to assure that the baking soda is evenly blended but keep in mind the brittle still cooks some while you're stiring in that hot pot. My second batch was better but still not perfect. Better mixing lead to less baking soda taste.

The marshmallows were the most fun. I really love the lemon flavored ones. I can think of all sorts of confectionary ideas for using it. Other flavors which are a must try for me are strawberry and raspberry. I even thought of some spice blend resemblant of sweet potato pie. Stop me before I go nuts. I'll also have to try the cookie cutter idea for making varying shapes. This could be a new fad comparable to cupcakes. There are all sorts of things to do with homemade marshmallows. Who knew? Marshmallows, the confection of 2007.

Saturday, December 02, 2006

A Mountain Of Cookies To Build a Tree

Boy have I been busy. A mountain of cookies for my christmas tree. when I started this project, I didn't really think about how many cookies I had to decorate. Luckily this is a No Fail Sugar Cookie recipe I first got from Kitchen Gifts a number of years ago. I play around and use varying extracts including almond, lemon, orange and combination of these. I am consisitent in using the exact amount of the other ingredients.


NO FAIL SUGAR COOKIES
6 cups flour
3 tsp. baking powder
2 cups butter
2 cups sugar
2 eggs
2 tsp. vanilla extract
1 tsp. salt

Cream butter and sugar. Add eggs and vanilla. Mix dry ingredients and add to butter mixture. Mix well.

Chill for 1 to 2 hours

Roll to desired thickness (I like ¼ inch) and cut into desired shapes. Bake on ungreased baking sheet at 350 degrees for 8 to 10 minutes or until just beginning to turn brown around the edges. This recipe
can make up to 8-dozen 3" cookies.

Royal Icing (from Kitchen Gifts)

2 tablespoons meringue powder
1/4 cup water (I sometimes substitute with rose water, key lime juice or lemon juice)
About 2 cups confectioners' sugar
1 teaspoon flavoring such as vanilla, lemon, orange or almond (optional to use any flavoring in the royal icing.)

It's easiest to make royal icing if you use a large electric mixer. You can make smaller quantities in
a small bowl and just stirring with a spoon.

Put confectioners' sugar, meringue powder and flavoring in mixing bowl. Start mixer and add water a little at a time until you get the desired consistency. It's best to keep it a little stiff at first and thin it later to pipe or fill.

Mix until smooth and shiny.

Take out portions of it to tint with food coloring. Keep the icing you are not working with covered with a damp cloth or paper towel so it doesn't dry out.


See more cookie photos on Flickr

Friday, December 01, 2006

Trying to Get Into the Christmas Spirit


Sorry for the lack of posts this week. After Thanskgiving, I found it hard to get into the Christmas spirit. Decided to bake some. This is just a preview of my current project-decorated sugar cookies. More to come.

Thursday, November 23, 2006

Turducken Success Story

Thanksgiving 2006 and dinner has been served. The Turducken came off the smoker around 11am (12 hour cook) after reaching an internal temp of 170 (probably could have taken off at 165). We wrapped it in foil and waited to cut it until dinner was served.
It was beautiful, cooked through with all the layers distinctively apparent. How did it taste? It was very good. No salty areas after an overnight brine, moist and seasoned just right. Pat myself and my son on the back.

I tried a new candied sweet potato recipe I got off the FoodTV site. This one used Steen's cane syrup and pecans. Very tasty. Will do again. I made the Monkey Bread from scratch using a recipe for dinner rolls. My adjustment was to dip the dough pieces in butter laced with lots of garlic. Yum.
The ham was a standard spiral cut ham from Costco using it's enclosed glaze packet. I inserted whole cloves all over the ham and I also basted it with the juice from some Maraschino cherries before coating with the honey glaze.

My plate

I also put together a cheese plate which no one touched. Sounded like a good idea when purchased the cheese. No one wanted to waste the space in their stomachs.


See my previous posts for other items on my dinner menu. My son made the sweet potato pies. He used my mom's basic recipe but he substituted the vanilla extract with vanilla beans and he used heavy cream in place of the sour cream.
Dessert
Stuffing

I hope you all had a lovely day and spent quality time with friends and family. The holidays are upon us and lots of cooking to come.

Turducken Ready To Come Off Smoker

After a 12 hour smoke with the temps between 225 and 250 (did drop to < 200 around 5 am for a bit), the turducken is ready to wrap. Took a while to get to 170 degrees internal temp. I'm not going to cut it for a couple of hours but I feel sure it done through and through per my instant read thermometer.

Wednesday, November 22, 2006

Thanksgiving 2006 Dinner -Day Before Progress and Turducken

Mac and Cheese
Corn Pudding
Smoker
Turducken Ready to Smoke
Smokin'

Prep Area for Turducken

Sweet Potatoes Ready to Candy